Making moulding and trim projects is that kind of fabulous ways to make your home look and feel more custom and expensive. If you want to make small changes in your home that will leave a big impact then try experimenting with different kinds of molding. While the classic types are made from wood or plaster, now you can find molding made from foam as well. Therefore, in most cases, making a molding renovation is budget-friendly. Have a look here’s classic cases we have gathered for you!
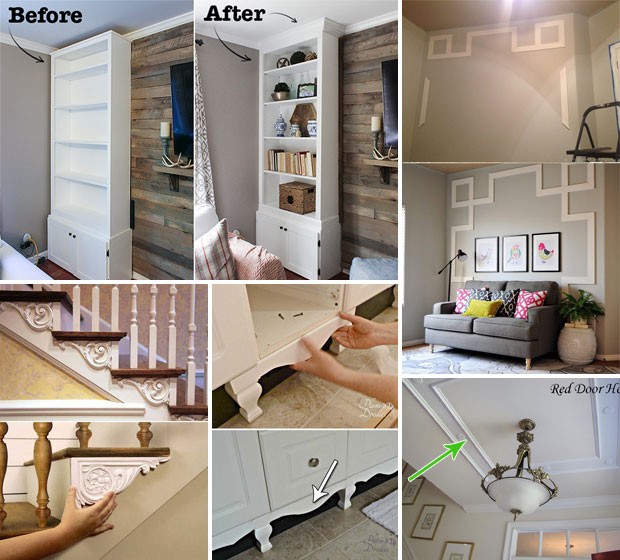
1. Attach crown molding to the top of the bookcases to convert them into built-ins:
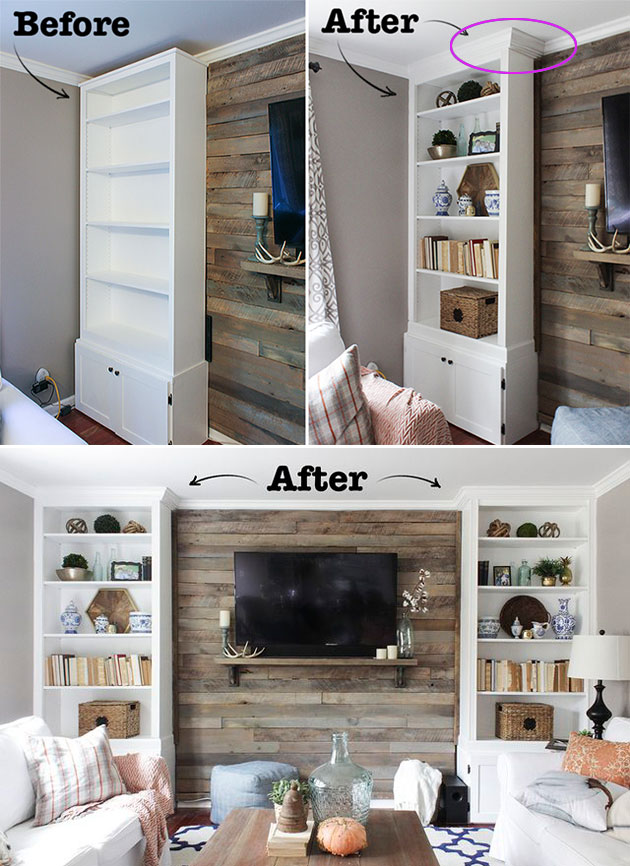
Attach the crown molding to the top of the bookcase so that both 45-degree angles are flush and both coped ends are flush against the existing crown molding on the wall. Go check out the detailed guide at ehow.com.
2. Build a custom tv frame with molding boards that will give your TV wall a fresh facelift:
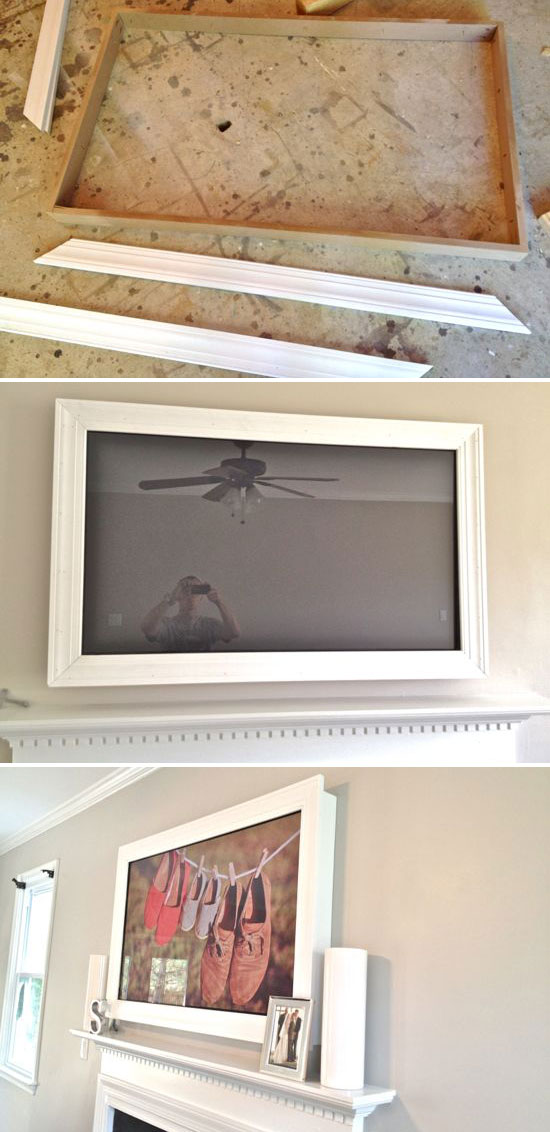
See the step by step instructions here!
3. Do a makeover for a basic, builder-grade island by adding the custom trim work and new countertop:
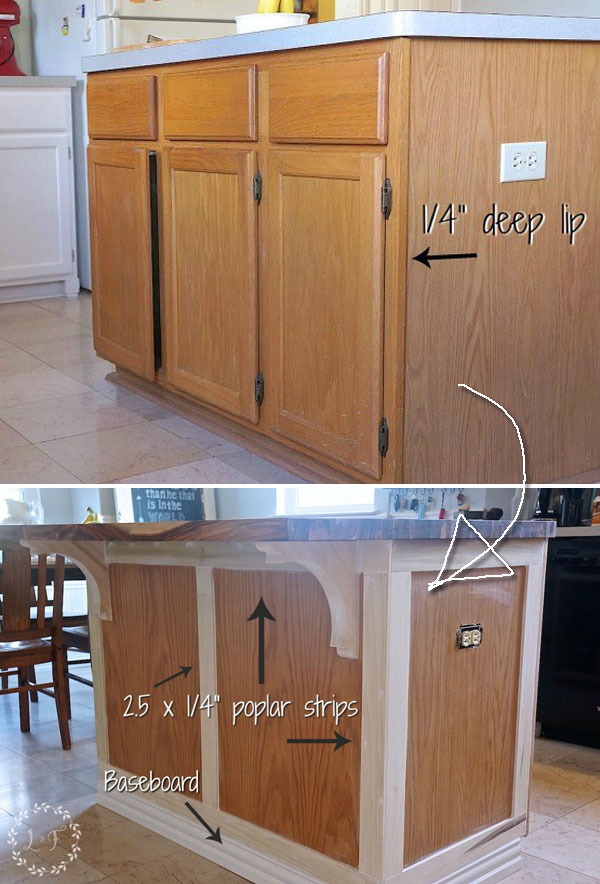
unknown source. If you found the REAL source, please let me know.
4. Tired of your blank walls, then do a Greek key molding wall to make change:
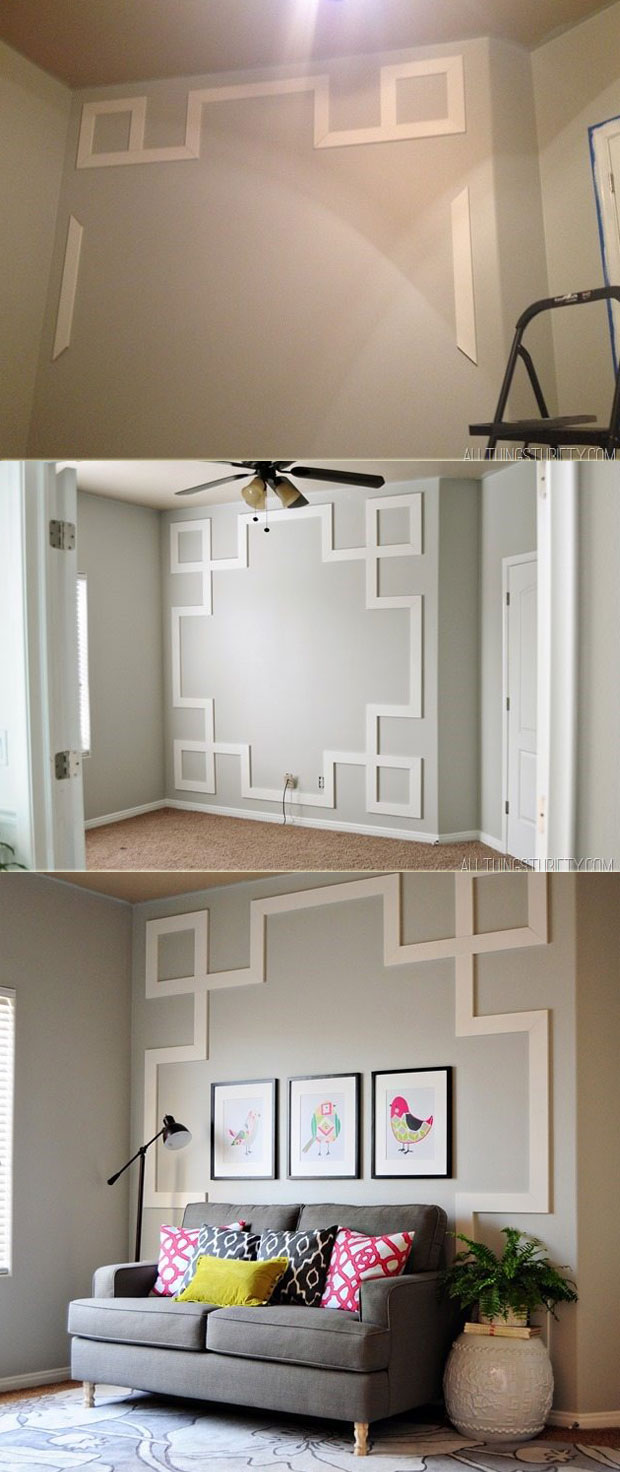
For this project You will need: A Miter saw, A Brad nailer and 1 1/4 inch nails, Levels, some MDF boards, Paintable Caulk and White Paint. See the detailed guide here.
5. Use the decorative brackets to turn the exposed side of staircases into an elegant eye-catcher:
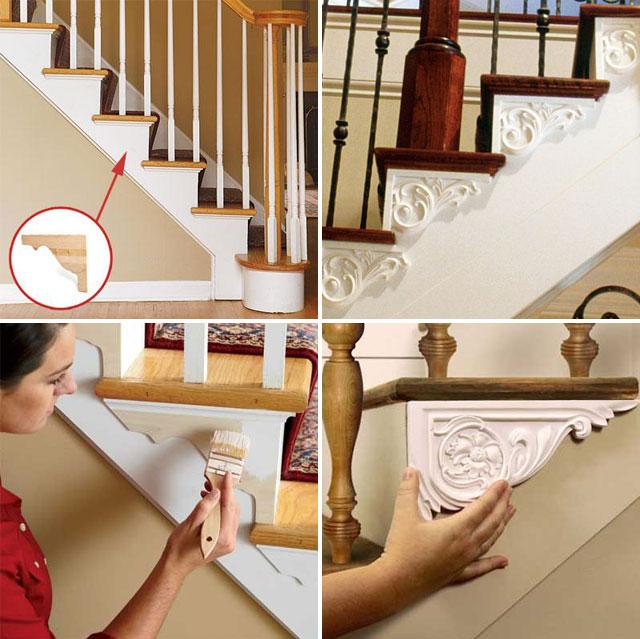
It is a low-cost DIY upgrade with 6 steps: 1.Trim the Brackets to 2.Fit Rough Up the Surface 3.Apply Adhesive Caulk 4.Secure the Bracket 5.Prep the Brackets for Paint 6.Prime and Paint Each Bracket Check the full tutorial here.
6. If your doors need a little up gradation for making them classy on budget, then trim them:
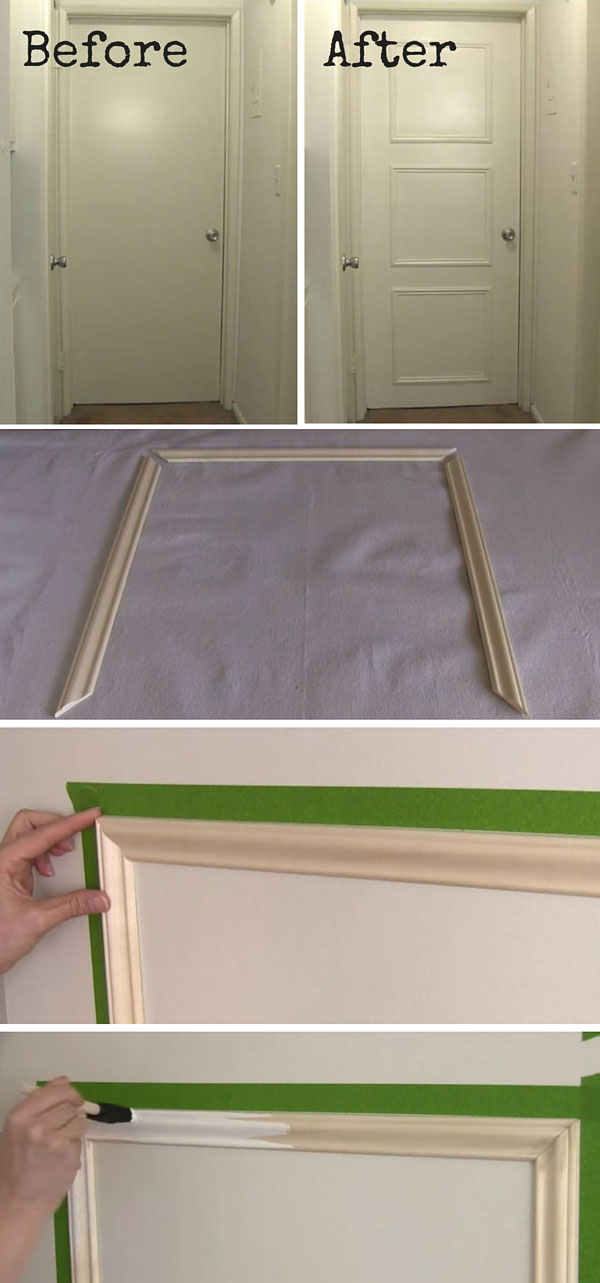
See the video tutorial below:
7. Bulk Up Your Baseboards with Wood Trim and Paint:
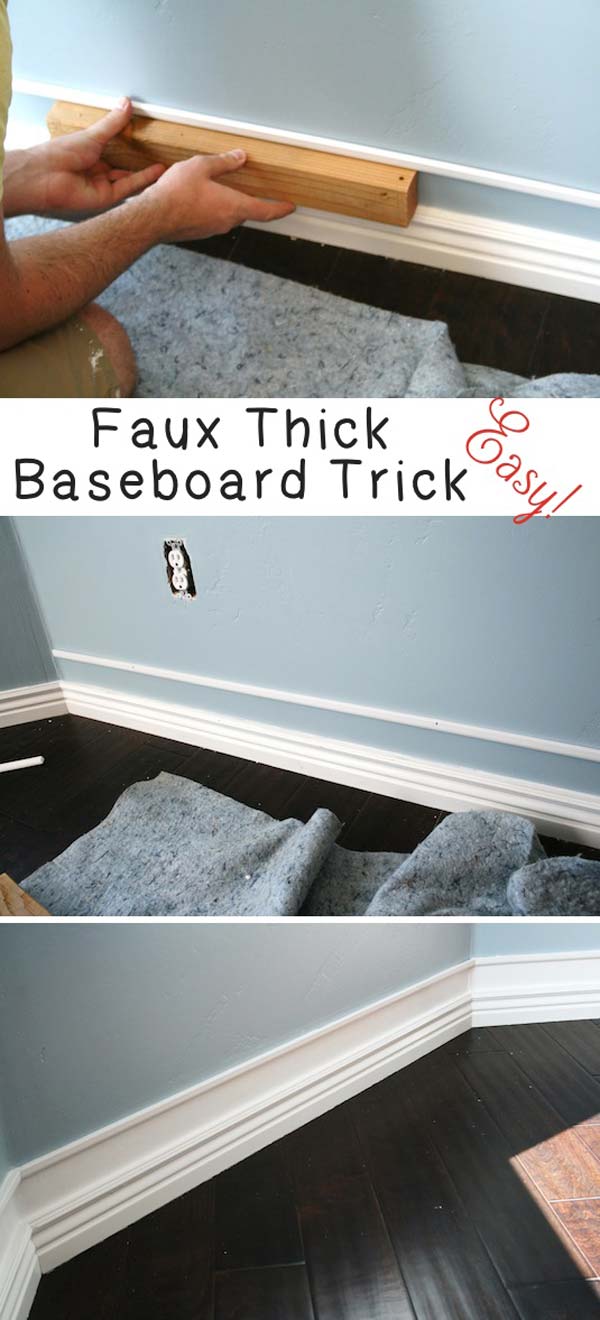
All you need is some wooden plans and molding, which needs to be placed on top to give the illusion of it being thicker than it is. Get the full guide here.
8. Made a regular bathroom cabinet feel a bit more upscale by adding a couple of the finial wood accents to the base of the cabinet:
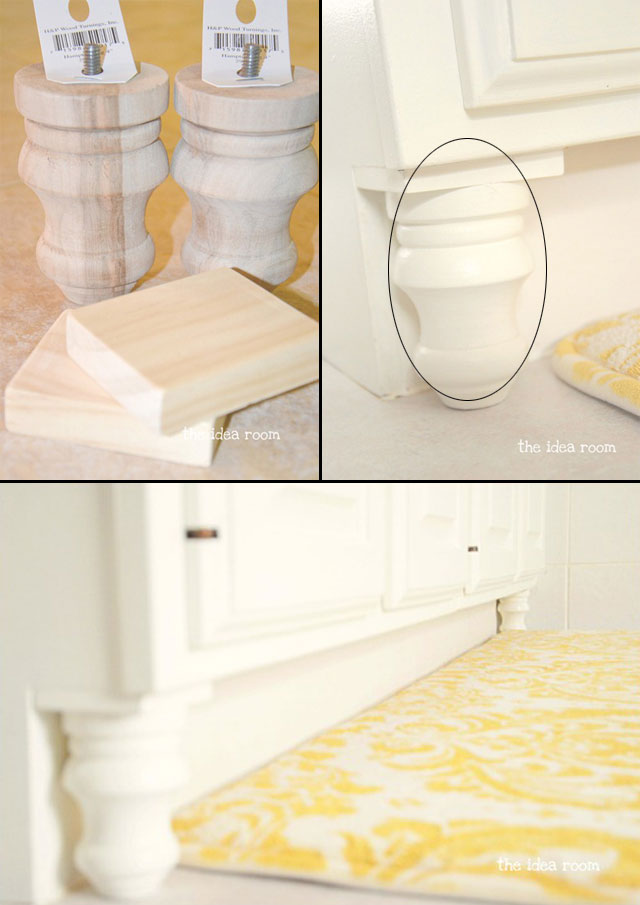
Check the step by step instructions here!
9. Building glass shelves with quarter-round molding is a way to use the kitchen window space over the sink:
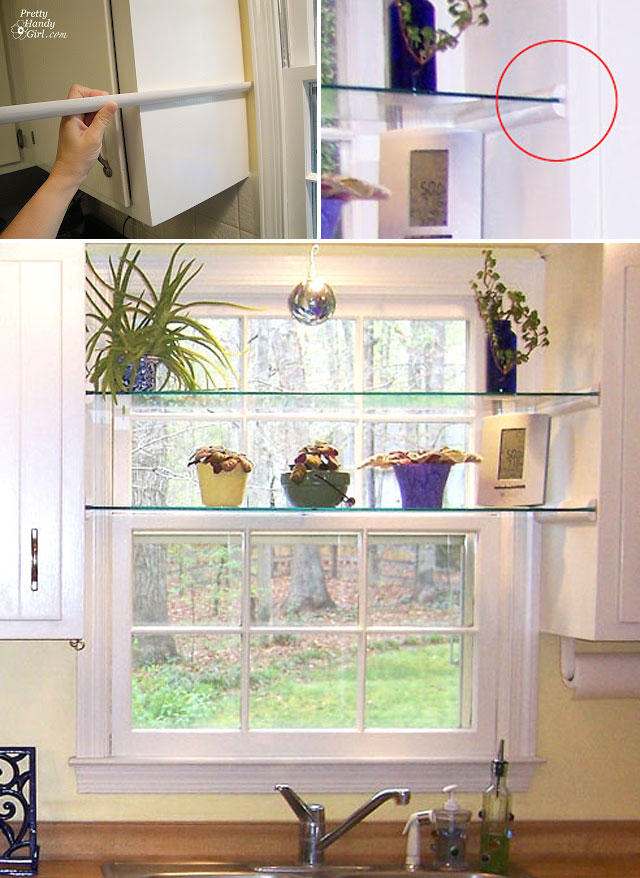
Using the measurement you took for the depth of your cabinets, cut 8 lengths of quarter round (four for each glass shelf you are hanging.) Take a look the step-by-step process for installing it here.
10. Add wood molding to bathroom mirror to give it a little facelift:
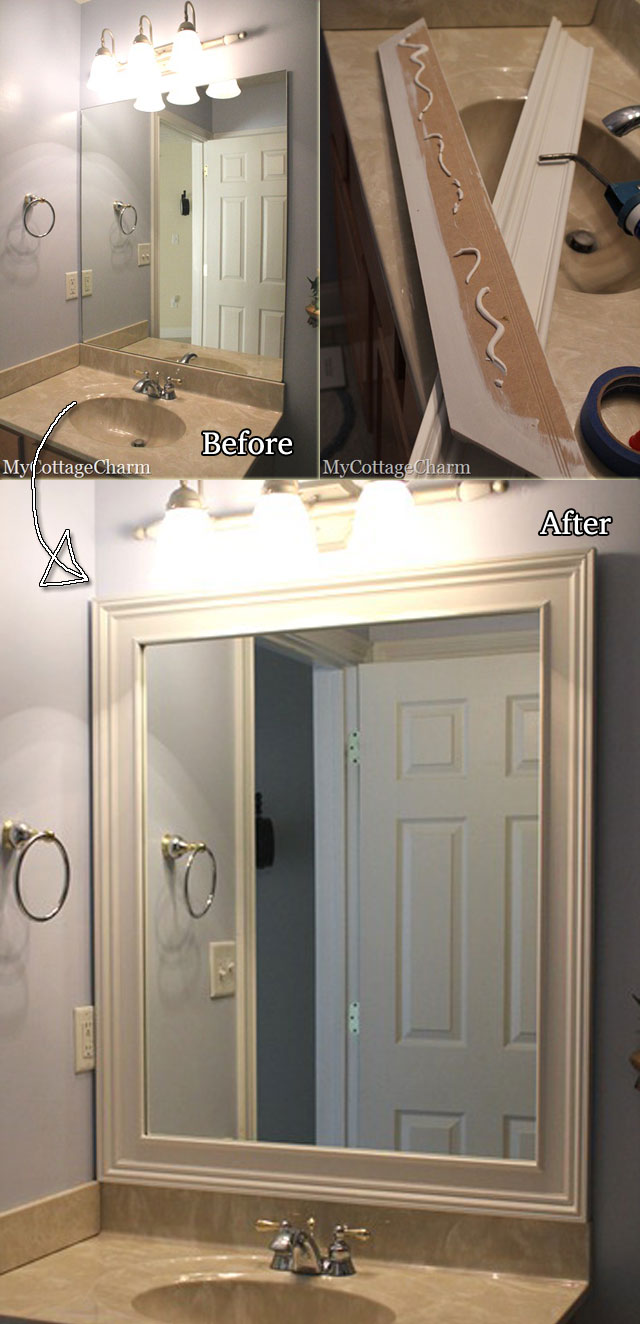
First you should measure your mirror, and then cut wood molding a little bigger so you wouldn’t be able to see the mirrors edge. After cutting the wood, you just need to use a caulk gun to install. See the detailed instruction at mycottagecharm.com.
11. A terrific way to add character to any wall is with wainscoting because it brings dimension and value to plain walls:
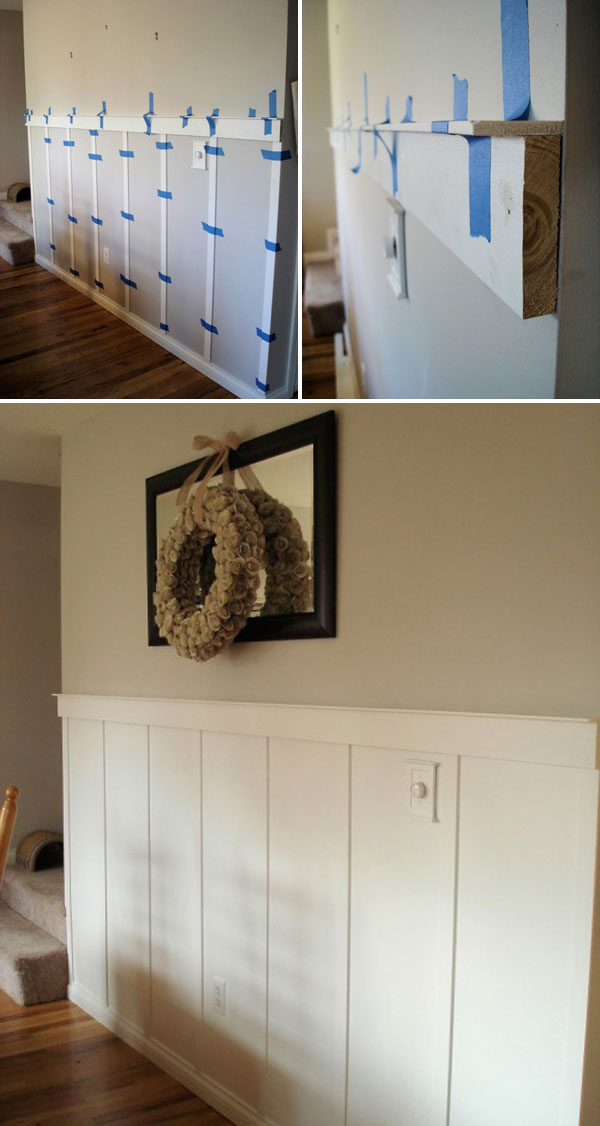
See the tutorial over at Lovely Crafty Home.
Another similar project:

12. Add skirt sections to the bottom of the bathroom cabinets:
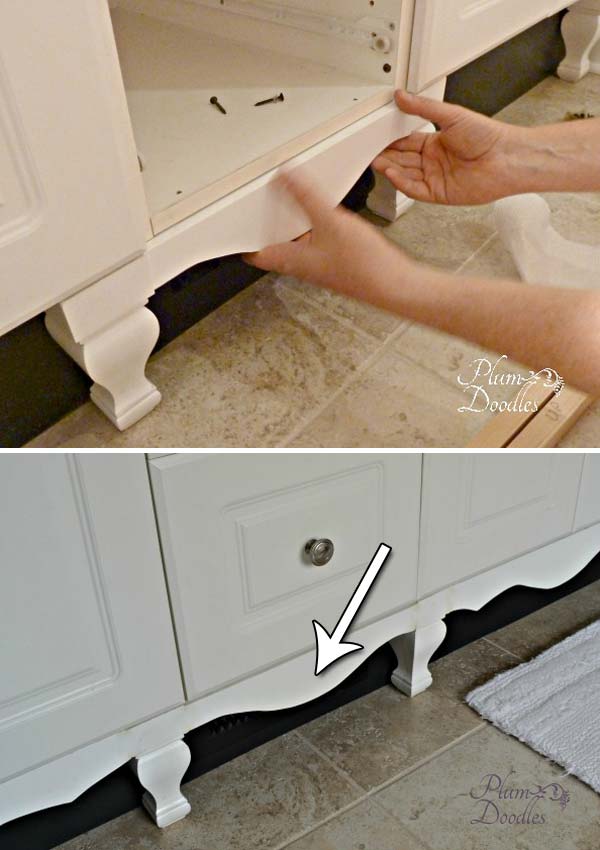
Cut the design out of cardboard and modified as needed for each skirt section. Get the more details here!
13. Frame light fixture with molding to give the hall ceiling a different accent:
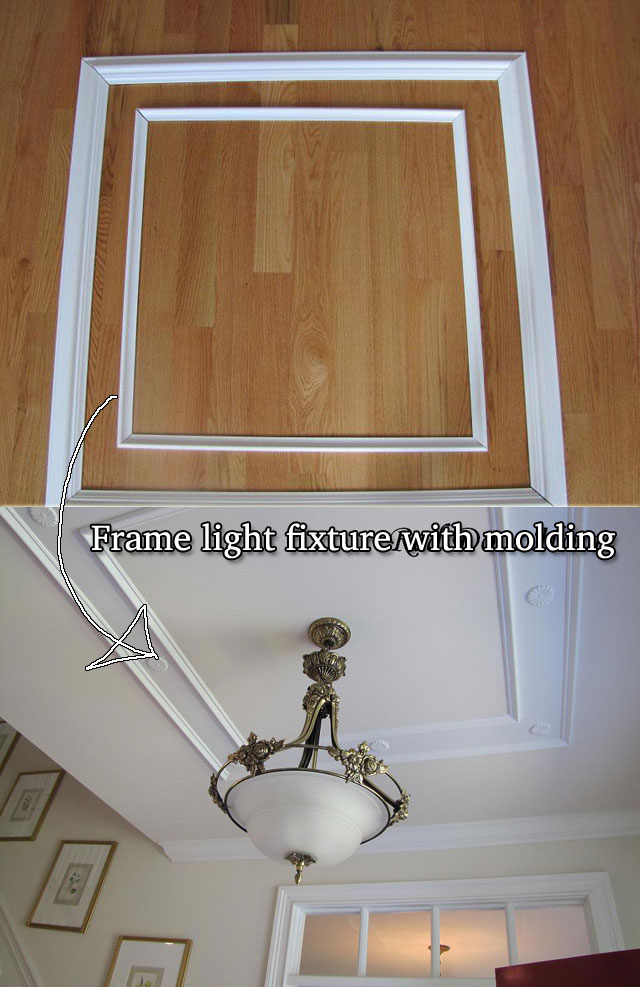
Cut four 4’ boards for the outside molding and four 3’ boards for the inside molding to create two frames. After nailing the boards and rosettes in place, the nail holes were filled and the space between the boards was painted the same white semi gloss as the trim.
Go check out the full guide here!
14. Build your own molding wall shelves from solid wood and mdf crown to fit your space:
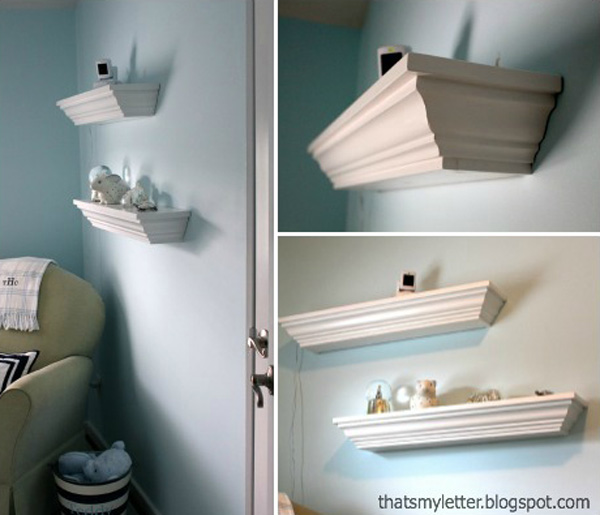
See the full tutorial here.
15. The added molding to the top of the entrance makes it appear more like a grand entrance:
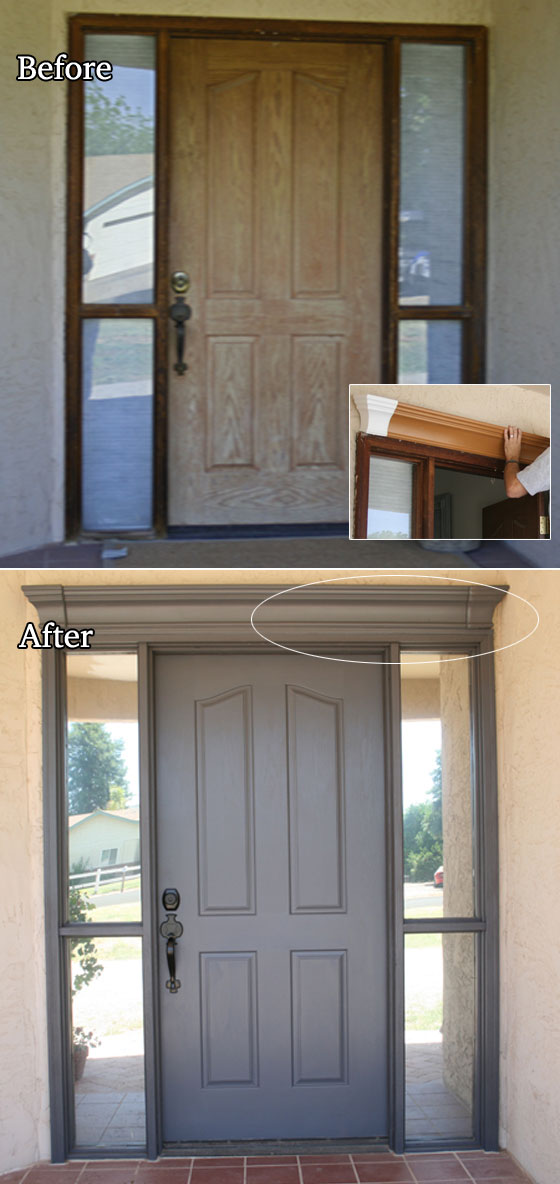
The molding is made out of foam. Get the full instructions here.


